RC boat performance starts with the hull. Each hull type rides the water differently, turns differently, and demands a slightly different setup to run fast, stable, and predictable. In this guide, you’ll learn the key RC boat hull types—monohull, catamaran, sport hydroplane, outboard tunnel hull (F1), and outrigger hydro—plus practical baseline setup targets for center of gravity (CG), strut/stinger position, rudder cooling pickup, trim tabs, and turn fins. Use these sections as reliable starting points before fine-tuning for your water conditions and speed goals.
Balance on a monohull is typically achieved around 25–35% of the hull length from the rear transom, where the hull makes contact with the water.
Several key components are attached to the transom area, each playing a critical role in performance. Proper installation and adjustment of these parts are essential for a well-performing monohull. Recommended hardware and setup tips include:
Stinger or Strut Outdrive for Monohulls
For most monohull RC boats, a stinger outdrive is the preferred choice. It houses the flex shaft and supports the prop shaft for reliable performance. While a strut can also be used, it must be specifically designed for a monohull—struts intended for other hull types sit under the hull and will not work properly.
The propeller distance from the hull is typically 5–7% of the hull length, providing a balance between stability, handling, and overall performance. Common shaft sizes for stingers and struts are 3/16”, followed by 1/8” and 1/4” diameters.
To install the flex shaft:
Cut a hole in the transom to allow the shaft to exit the hull.
Position the hole as low as possible in the bottom of the V for optimal alignment.
Adjust the drive angle so the shaft runs roughly parallel to the hull bottom as a starting point.
This setup ensures smooth thrust, proper alignment, and reliable performance for your monohull.
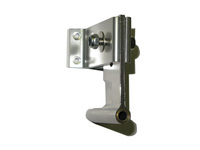
Rudder with Water Pickup
The rudder is a critical component for steering any RC monohull. Choose a rudder size appropriate for your hull length—approximately 15% of the hull length is a good starting point.
Rudder placement affects performance: a rudder mounted higher on the transom will sit further out of the water and may require a slightly larger size to maintain control.
It’s recommended to use a rudder with a built-in water pickup to ensure consistent cooling for the motor and electronics. If your rudder does not include a pickup, an external water pickup should be installed to maintain proper water flow through your cooling system.
This ensures smooth steering, effective cooling, and reliable handling for your monohull RC boat.
Trim Tabs on a Monohull
Trim tabs help adjust the ride attitude of a mono hull, improving steering and handling. Lowering the tabs pushes the bow of the hull down, allowing the boat to run “wet” and increase water contact for better control.
Trim tabs should be mounted near the bottom vee of the hull, parallel to the surface, with a small clearance of 1–2 mm above the hull bottom. Proper placement ensures effective control without interfering with hull performance.
Refer to the diagram below for guidance on positioning and alignment.
Turn Fins for a Monohull
Turn fins improve cornering by providing a pivot point for the hull. On a mono hull, the fins usually contact the water only at the start of a turn.
For proper setup:
Mount the turn fin at the highest point of the hull’s bottom surface.
Ensure the fin is perpendicular to the hull for maximum effectiveness.
Refer to the diagram below for placement and alignment guidance.
Balance and Center of Gravity Monohull
For a mono (Vee) hull, the center of gravity should be positioned around 25–35% of the wetted hull length, measured from the rear (transom) forward. Proper balance in this range ensures stable handling, smooth acceleration, and predictable cornering.
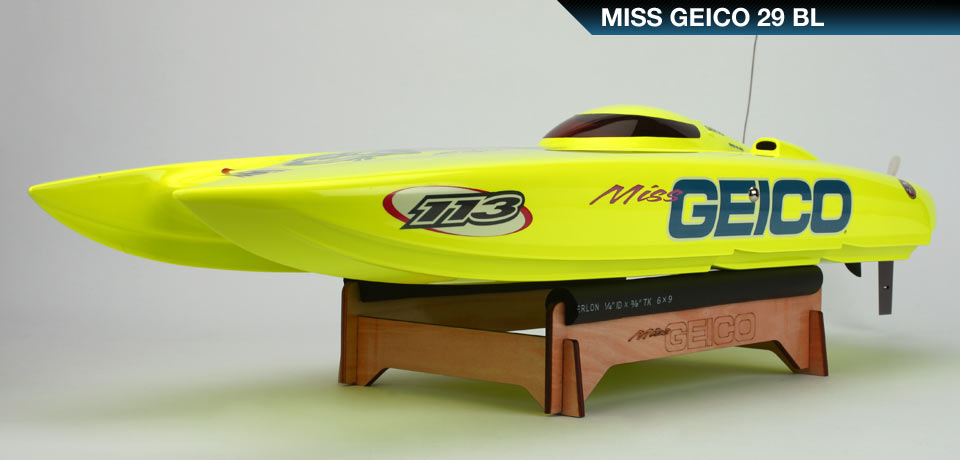
RC Catamaran Hull Boat and Setup
The catamaran hull features two outer sponsons with a tunnel in the center, offering improved speed and handling compared to a mono hull. Catamaran hulls perform well in rough conditions and are generally straightforward to set up.
For optimal performance, the balance point is typically 25–35% of the hull’s wetted length, measured from the rear (transom) forward.
Key components mounted at the transom for a catamaran setup include:
Optional cooling water pickup – if required by your setup
Strut – supports and aligns the prop shaft
Rudder – for precise steering
Drive Strut Setup – Catamaran Hull
When selecting a strut for a catamaran hull, it’s important to account for the depth the strut must reach. Unlike a mono hull, the prop shaft section of a catamaran strut typically sits further forward from the mounting surface.
Mounting Guidelines for the First Run:
The reference position is where the centerline of the prop shaft is even with the lowest edge of the sponsons. This is your starting point for the first run.
Ensure the strut allows adjustment room for fine-tuning:
Raise: Allocate ~60% of total adjustment range
Lower: Allocate ~40% of total adjustment range
Example: If total height adjustment is 1″, allow 0.6″ for raising and 0.4″ for lowering.
Set the prop shaft angle to 0° (neutral) for the initial run.
This setup ensures safe initial testing while providing room for performance tuning.
Rudder with Water Pickup – Catamaran Hull
A rudder is essential for steering any RC catamaran hull. When selecting a rudder:
Choose a size appropriate for your hull length. A good starting point is ~15% of the hull length.
It is recommended to use a rudder with a water pickup. If the rudder does not include one, an external pickup should be installed.
Center of Gravity – Catamaran Hull
For optimal performance, the center of gravity (CG) on a catamaran hull should be positioned around 25–35% of the total wetted surface length, measured from the rear of the hull.
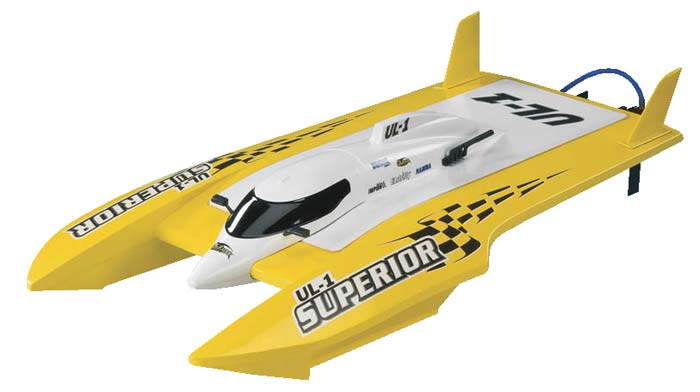
RC Sport Hydroplane Hull Boat and Setup
The full-bodied hydroplane hull is designed for maximum speed and precise handling. It performs exceptionally on flat water at full throttle but is less capable in rough conditions and can be tricky to set up.
Turning: Optimized for clockwise turns, common in RC oval racing. A turn fin on the right-hand sponson keeps the inner sponson planted during right turns. Left turns are possible but require caution, as aggressive maneuvers may flip the hull.
Balance Point: Typically located at or just behind the trailing edge of the front sponsons.
Hydroplane Hull Setup
Hydro hulls are designed for high-speed, realistic-looking racing. These boats require careful tuning to reach their full potential:
Full Throttle Performance: Hydro hulls excel only at wide-open throttle. Off-throttle operation significantly reduces handling.
Cornering: The turn fin provides the main pivot point for sharp, controlled turns at race speeds.
Initial Launch: From a standstill, hydro hulls sit deep in the water, with front sponsons initially plowing slightly until fully on plane.
Hydro hulls reward careful setup with incredible speed and maneuverability for experienced RC racers, but they demand attention to trim, balance, and throttle control.
Strut Setup for Hydroplane Hulls
The strut on a hydro hull supports the prop shaft and must be selected and mounted with precision to optimize speed and handling. Hydro hull struts differ from mono hull struts in that the prop section often sits further forward from the mounting surface.
Initial Positioning
For the first run, establish a reference position for fine-tuning later:
Hydro hulls with rear sponsons: Align the centerline of the prop shaft with the furthest bottom edge of the sponsons.
Hydro hulls without rear sponsons: Position the prop shaft approximately 3/8″ below the bottom surface for a 33″ hull, or 1/4″ for a 26″ hull. Scale proportionally for other hull lengths.
Adjustment Range
When mounting, allow room for fine adjustments:
Raising the strut: Allocate 60% of the total adjustment range.
Lowering the strut: Allocate the remaining 40%.
Example: If the strut allows 1″ of total height adjustment, use 0.6″ for raising and 0.4″ for lowering.
Prop shaft angle: Set to 0° (neutral) for the initial run.
Proper strut placement ensures the hull planes efficiently, maximizes speed, and allows for precise tuning in subsequent runs.
Turn Fin Setup for Hydro Hulls
The turn fin is a critical component that allows a hydro hull to corner sharply and maintain stability at high speeds. Proper selection and placement are essential for optimal performance.
Shape: The turn fin typically features a curved or bent section near the bottom, which helps the hull “grab” the water during turns. The bent portion should face toward the inside of the hull.
Placement: Mount the turn fin at the rear of the right-hand sponson to facilitate right-hand turns, which is standard for most RC hydro racing courses.
Important Note: Never mount a turn fin on both sponsons, as opposing forces will conflict and may cause the hull to flip.
Correctly installed, the turn fin acts like a pivot, allowing your hydro hull to handle corners like it’s on rails while maintaining full-speed stability.
Rudder Setup with Water Pickup for Hydro Hulls
A rudder is essential for steering any RC hydro hull. Selecting the correct size and placement ensures precise control and stability at high speeds.
Size: A good starting point is roughly 15% of the hull’s total length. Adjust as needed based on handling and hull size.
Water Cooling: Rudders with built-in water pickups are recommended but not required. If your rudder does not include a pickup, an external water pickup should be used to ensure proper cooling for the motor and ESC.
Proper rudder selection and placement complement the turn fin and strut, giving your hydro hull responsive, stable handling during racing conditions.
Center of Gravity
The center of gravity (CG) is critical for stability and handling on a hydro hull. On most hydro hulls, the CG is typically aligned with the mounting position of the turn fin.
Proper CG placement ensures the hull corners cleanly, maintains balance at high speeds, and prevents unwanted flipping during right-hand turns.
Placement: Usually at the rear of the main sponsons or just slightly behind.
RC Outboard Tunnel hull and Setup
The F1 Tunnel Hull features two outer sponsons with a central tunnel and cowl, designed for maximum speed and handling. These hulls are always powered with an outboard motor mounted at the rear. While they offer excellent performance, their handling in rough water is average, and trim adjustments require moderate setup skill.
Balance: Typically 25–35% of the hull length measured from the rear where the hull contacts the water.
Hull Setup: The F1 Tunnel Hull uses a single integrated outboard motor assembly, which includes the motor and drive line as one unit. This assembly controls and supports all necessary adjustments, simplifying alignment and trim compared to separate components.
Outboard Motor Assembly
There are a handful of specialized outboard motor units available for Tunnel Hulls today. Most are optimized for 4S LiPo setups and designed to drive props up to roughly 47mm to maintain proper clearance.
For larger setups, there are a few models available that are good from the old 7.5cc nitro setups to gas models that can push up to 50in of hull!
Setting Up an Outboard Unit on a Tunnel Hull
When mounting the Outboard Unit on a Tunnel Hull, it’s essential to determine the final position for the initial run, as this serves as the baseline for future fine-tuning.
Reference Position: Align the center prop line of the outboard with the furthest bottom edge of the sponsons. This serves as the starting point for adjustments.
Height Adjustment: Allow room to raise or lower the outboard:
60% of total adjustment for raising
40% of total adjustment for lowering
Example: If the outboard has 1” total adjustment, 0.6” is for raising, 0.4” for lowering.
Prop Shaft Angle: Set to 0° (neutral) for the first run.
Following this method ensures proper clearance, alignment, and performance while minimizing the risk of cavitation or uneven thrust.
Center of Gravity: For a Tunnel Hull, the CG should be around 25–35% of the total wetted hull length, measured from the rear forward.
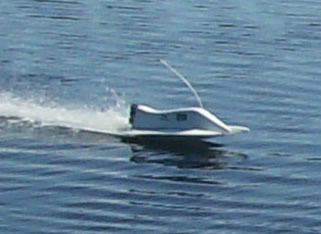
RC Outrigger Hull (Hydroplane) Setup
Outrigger Hydro-style RC boats are pure speed racing machines. Derived from traditional hydroplanes, these hulls are designed to minimize drag and maximize performance. They are extremely fast and fun but require careful setup to reach their full potential.
Outrigger hulls perform best at wide-open throttle. At lower speeds, they corner poorly and must be fully on plane to handle correctly. From a dead stop, the hull sits deep in the water due to minimal flotation, and the booms connecting the central tub to the outer sponsons may plow through the water, sometimes nearly fully submerged. Small wakes can affect the hull if it sits too low.
While designed for racing at maximum performance, sport hobbyists can set up Outrigger hulls for a more conservative, manageable experience.
Strut Setup for Outriggers
The strut is critical for supporting the prop shaft and positioning the drive line.
Depth Considerations: Outrigger struts typically sit further ahead of the mounting surface compared to Mono hull struts.
Initial Mounting Position:
Align the center prop line with the lowest point of the sponson bottom (or a reference line if rear sponsons are absent).
For a 33″ hull: place the strut ~3/8″ below the bottom surface.
For a 26″ hull: place ~1/4″ below the bottom surface.
Scale proportionally for other hull lengths.
Adjustment Allowances:
60% of total adjustment for raising the strut.
40% for lowering.
Prop Shaft Angle: Set to 0° (neutral) for the first run.
Proper strut setup ensures consistent drive, reduces drag, and allows fine-tuning for performance.
Turn Fin for Outriggers
On an Outrigger-style hull, the turn fin is mounted on the right-hand sponson. It features a curved shape near the bottom to help the hull hold corners at high speed.
Placement Options:
Mounted at the rear of the sponson (typical setup).
Mounted a few inches behind the sponson using a boom extension for fine-tuning cornering performance.
This fin is critical for stability and turning precision—proper placement ensures the hull remains on plane through tight turns.
Rudder with Water Pickup
A rudder is essential for steering any RC Outrigger hull. Choose a rudder sized appropriately for your hull length—roughly 15% of the hull length is a good starting point.
Water Pickup:
Optional but recommended for consistent cooling.
If the rudder does not include a water pickup, an external pickup can be installed to maintain proper water flow.
Proper rudder selection and placement ensures responsive steering and stable handling during high-speed runs.
Center of Gravity
For an Outrigger hull, the center of gravity is typically aligned with the turn fin location, usually at the rear of the main sponsons or just a few inches behind. Proper CG placement is critical for stability, cornering, and overall handling at high speeds.
Reference: See the accompanying drawing for visual guidance on CG placement relative to the strut, turn fin, and rudder.


 Turn fins improve cornering by providing a pivot point for the hull. On a mono hull, the fins usually contact the water only at the start of a turn.